PHILIPPE BOLTON
HANDMADE RECORDERS & FLAGEOLETS
MAINTENANCE TIPS FOR WOODEN RECORDERS
Here are some suggestions for keeping wooden recorders in good condition.
1° PLAYING IN a new recorder
Wood needs to become accustomed to warmth & dampness caused by playing. You must therefore play in your instrument progressively, not exceeding the following time limits:
| during the | you can play for | |
|
1st week 2nd week 3rd week 4th week |
10 minutes per day 15 minutes per day 15 minutes per day 30 minutes per day |
After this period you can increase the time by reasonable steps.
From the beginning you can play all the notes, paying attention to tone quality and intonation.
2° CARE OF THE RECORDER
Do not expose the recorder to excessive heat or cold, or to sudden temperature changes. Do not therefore leave it near a radiator, in direct sunlight, in a parked car... etc.
If it is cold, warm it in your hands before playing to limit condensation.
To reduce the risk of fungus in the windway it is good practise to brush one's teeth whenever possible before playing.
AFTER PLAYING...
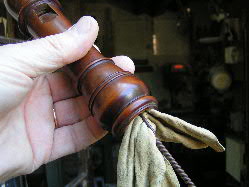
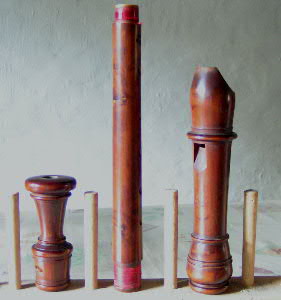
Carefully wipe out the bore with a cloth or piece of chamois leather. Suck dry air into the windway through the beak, while closing the bottom end of the head joint with one hand, to remove some of the dampness there, and exhale it outside the recorder. Do this for one or two minutes. Then let the instrument dry out completely (especially the windway which cannot be wiped) before closing its case. It is a good idea to use a stand for this, so that the pieces are held vertically.
|
|
If the different parts become impossible to separate after a long playing session because the joints have become damp do not attempt to force them apart since this could cause damage. Just wipe the inside as shown above and let them dry out completely. This can take several hours, or even a day or two. The instrument will be easy to take apart once it is dry. To avoid this happening again take off a little thread or grease the joint.
IF THE WINDWAY BECOMES BLOCKED BY CONDENSATION...
Since the instrument has been oiled during making, condensation may form in the windway after a few weeks. This can be easily removed with detergent (water and washing-up liquid in equal parts + a little alcohol). Either take the block out (see the page on advanced operations on the windway) and apply the liquid onto the windway and block surfaces using a cotton bud, or, without removing the block, use a dropper to let it flow into the window end while blocking the beak end with one finger. Wait for a few moments, then blow it out backwards through the beak while blocking the socket.
![]()
Click here for more detailed information on condensation in recorders
OILING...
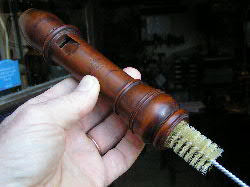
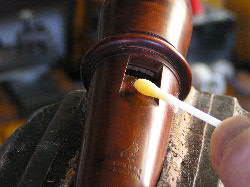
Oil the recorder every 3 months with linseed oil or every month with almond oil. The best tool for this is a bottle brush of the right diameter which will put a thin layer of oil over the whole bore surface, but you can also use a mop, a piece of cloth fixed to a rod with a slit in the end, or even a large feather to to do the job. You can also oil the labium sparingly with a cotton bud or small paintbrush but NEVER the block and windway. Do not overoil.
|
|

| Let the oil soak into the wood for a few hours, preferably keeping the instrument in a vertical position on a stand, then wipe away all the excess in the bore and the holes that has not been absorbed. You can use wiping paper for this. |

|
THREAD JOINTS...
You can repair or adjust thread joints yourself. If they become too loose it is often sufficient to add a little thread. If they are too tight you can take some off. For this you can use buttonhole silk or polyester which you wax with beeswax. Simply pull the thread across the wax. It should then stick to the joint. Be careful not to put on too much thread or there could be a risk of splitting the instrument. Check this by carefully trying to assemble the recorder as you go along. After much use it can become necessary to change the joint completely. Cut away the old thread without touching the wood, and wind on some new waxed thread (cf drawing below). Begin by laying a loop lengthwise along the tenon, continue wrapping the thread around it, keeping the layer as regular as possible. As before, be careful not to put on too much. To secure the joint just pass the end through the loop and pull it back under the joint.

|
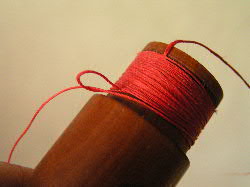
|
Thread joints that have been correctly fixed as shown above can be greased with vaseline or with a mixture of equal parts of vaseline and beeswax melted together in a jar heated in boiling water.
Unfixed thread will unwind if greased.
Click here for a page on recorder joint maintenance.